Frayz’s Inferno orange 182 - Back in the old flame

Joined
May 19, 2019
Messages
614
Reaction score
702
Location
Essex
You may remember when I replaced the radiator I found the AC condenser to be rotted through at the bottom.
So I ordered a new one, which arrived today, unfortunately our friends at FedEx decided to damage for me by bending the top row of fins by bending the brackets.

The distributor was superb about it and offered me another item or this one at a hugely discounted price. As I don’t want a bright silver cooler behind the grille, I had always planned to paint the new one matte black anyway. So the damage won’t be seen once installed.

So a quick dust of zinc etch primer and some matte black later, it’s ready to go in.


b660ca5e-cce9-4bda-bb56-22190f7cce9e-jpeg.jpg

0d0024d8-21be-497f-8632-b24281da49ea-jpeg.jpg
51577D91-D04D-4121-B71E-E72ED3D947D8.jpeg
 
Joined
May 19, 2019
Messages
614
Reaction score
702
Location
Essex
Finally the very last piece of my hub swap arrived in the form of 2 new Bosch ABS sensors.
I cleaned the holes and sprayed with Dynax before installing as hopefully this should stop them ever welding themselves in again.

Also nice to not have my dash lit up like a Christmas tree as it has been for the last week or so. Lol.


964d4406-f595-4748-8f4b-b60095f39b55-jpeg.jpg

764a4da1-cc51-4112-a800-1109fe693694-jpeg.jpg

d6bb93a7-ab3d-4c18-b754-6c7428871f2f-jpeg.jpg
8CC00873-934C-457B-AB21-810B2887A352.jpeg
 
Joined
Feb 22, 2016
Messages
608
Reaction score
497
Great write-ups and your attention to detail is on another level.

The car will be way better than new when you've finished and give plenty of smiles per mile for a long time yet.
 
Joined
May 19, 2019
Messages
614
Reaction score
702
Location
Essex
Great write-ups and your attention to detail is on another level.

The car will be way better than new when you've finished and give plenty of smiles per mile for a long time yet.

Thank you sir, I do hope so.
it’s still far from the condition of many others but it’s a tidy little thing and I just hope to keep it that way.
Doesn’t look too sat considering it does 50 miles a day, every day in all weathers.

I wanna see at least another 123k miles In it. ??
 
Joined
May 19, 2019
Messages
614
Reaction score
702
Location
Essex
Spent the last few days cleaning and prepping some engine bay bits to be painted. Ported/matched inlets, fuel rail guard, engine mount bracket the usual suspects.
Got these in paint yesterday. Overall I think they have come out reasonably well and should help clean the standard engine bay up nicely. They will go back with stainless cap head hardware to add some contrast.

Also decided to add further foam inside and trial fit a U rubber on the top of the rear boot trim. This sits up tight against the rear screen, looks almost OEM and should help stop any further trim rattles from back here.

Next up was beginning the prep on my bullets to refinish in silver. Currently rubbing these down with 1500 wet/dry. I’ll hit them with some Upol adhesion promoter before painting and hopefully should end up with a decent finish.


64912034-70f9-4264-a713-79f2ae012531-jpeg.jpg

59a2f11e-adf2-42bb-963a-55dbc3a00bc0-jpeg.jpg

16783372-5db2-4ede-868d-f7d0dba24aa9-jpeg.jpg

5d6afe68-9e9a-453a-8d0a-beff204cd68e-jpeg.jpg

b25b6eb9-2f0e-4b40-93e9-33b6c1b398a5-jpeg.jpg
92ECF08F-F9E7-41D6-8BF7-2482E7D77D49.jpeg
 

IRK

Joined
Jul 18, 2016
Messages
155
Reaction score
183
Location
Newcastle Upon Tyne
Trophy No.
196
Spent the last few days cleaning and prepping some engine bay bits to be painted. Ported/matched inlets, fuel rail guard, engine mount bracket the usual suspects.
Got these in paint yesterday. Overall I think they have come out reasonably well and should help clean the standard engine bay up nicely. They will go back with stainless cap head hardware to add some contrast.

Also decided to add further foam inside and trial fit a U rubber on the top of the rear boot trim. This sits up tight against the rear screen, looks almost OEM and should help stop any further trim rattles from back here.

Next up was beginning the prep on my bullets to refinish in silver. Currently rubbing these down with 1500 wet/dry. I’ll hit them with some Upol adhesion promoter before painting and hopefully should end up with a decent finish.


View attachment 26765

View attachment 26766

View attachment 26767

View attachment 26768

View attachment 26769
View attachment 26764
Do you by chance have a link to the u rubber please? The boot trim rattle has been driving me insane and really like this fix.
 
Joined
May 19, 2019
Messages
614
Reaction score
702
Location
Essex
Do you by chance have a link to the u rubber please? The boot trim rattle has been driving me insane and really like this fix.

Before you go buying, I havent confirmed this works yet, I’m just having a play. I had some in stock and I think it came from Car Builder Solutions years ago. If you search ebay etc for (3mm U edge rubber) you can choose some. You can buy different thicknesses for differing panel thickness. You want some with a 3mm channel.
 
  • Like
Reactions: IRK

IRK

Joined
Jul 18, 2016
Messages
155
Reaction score
183
Location
Newcastle Upon Tyne
Trophy No.
196
Before you go buying, I havent confirmed this works yet, I’m just having a play. I had some in stock and I think it came from Car Builder Solutions years ago. If you search ebay etc for (3mm U edge rubber) you can choose some. You can buy different thicknesses for differing panel thickness. You want some with a 3mm channel.
Great, cheers! I'll wait to see how it works for you before I order. I've got felt tape to fix various interior rattles and squeaks, but think the boot trim will need something more solid.
 
Joined
May 19, 2019
Messages
614
Reaction score
702
Location
Essex
Great, cheers! I'll wait to see how it works for you before I order. I've got felt tape to fix various interior rattles and squeaks, but think the boot trim will need something more solid.
When you pop the boot trim off you’ll see there are small male poppers in the metal work and female clips that sit in the trim. I found these female pieces to be quite loosely fitting in the trim panel. I added some spots of RTV silicone on them to stop them buzzing.
RTV if you’re not familiar goes off like black rubber and can be removed in future if needed.
 
Joined
Feb 24, 2018
Messages
145
Reaction score
169
Location
Solihull
Trophy No.
077
Great write up and pics as always! The engine/underbonnet components look awesome.

What was the Black Crackle Finish paint that you used and how did you prep the surfaces before painting?

That U tubing could be the answer to numerous niggly trim buzzing sounds as a result of Powerflex bushes and PMS solid front suspension top mounts. ??

Really useful info.
 
Joined
May 19, 2019
Messages
614
Reaction score
702
Location
Essex
Great write up and pics as always! The engine/underbonnet components look awesome.

What was the Black Crackle Finish paint that you used and how did you prep the surfaces before painting?

That U tubing could be the answer to numerous niggly trim buzzing sounds as a result of Powerflex bushes and PMS solid front suspension top mounts. ??

Really useful info.

Morning sir.
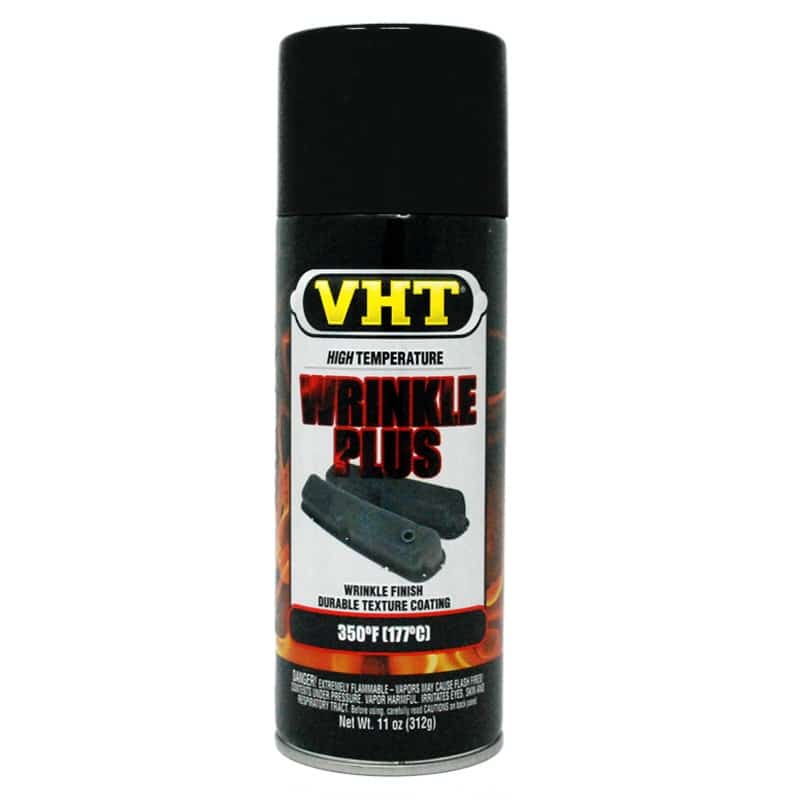
The paint in question is VHT wrinkle black. It’s good for high temp applications up to around 175c.

Prep wise, full degrease with just some concentrated household degreaser (Flash), hot water and a good scrubbing brush. I did this soaking the parts in large buckets of hot water. Keep doing this till all parts are clean and the water remains clear and free of oils.
After this it’s a good time to give all parts a good key up with red scotch pad, and clean all threads with a tap, and a light skim on the gasket faces with a flat block and some 600 wet/dry ready for reassembly.
You don’t have to do this, but I did.

VHT reacts with other paints so no need to use a primer at all. VHT day to do 2-3 thick coats, but I’ve found better results with 2 super light coats just to get the part in full colour. Once these coats are tacky, then a further light full coat, let it go tacky and a final finish coat.
Once the last coat is just about tacky, gently warm the paint with a heat gun. The wrinkles will come without heat but it works much better with heat added.
This should provide a really clean uniform finish.
Takes ages to dry so leave parts in a warm clean environment for a good 48 hours for it to fully cure.
VHT day the parts can also be baked in an oven. But I’ve done this and found no benefit so never done this since.

 
Joined
May 19, 2019
Messages
614
Reaction score
702
Location
Essex
Also regarding boot buzzing. If you have a solid poly exhaust mount, ditch it for a honeycomb Grams item. It cut out a lot of reverb through the boot foor for me.
 
Joined
Feb 24, 2018
Messages
145
Reaction score
169
Location
Solihull
Trophy No.
077
Thanks ever so much for taking the time to provide the comprehensive paint write up. The information I am sure will be much appreciated by all the forum community.

The information on the exhaust hanger bushing was also really interesting. Will look in to that.

Thanks again.
 
Joined
May 19, 2019
Messages
614
Reaction score
702
Location
Essex
Started the strip down for the cam cover paint today.
Spent a good hour or more prepping and cleaning the cover with a mix of various things, Billberry wheel cleaner, iron x, brake cleaner, various wire wheel fittings in a drill to get the cover as clean as possible.
Then rinsed and washed with plenty of hot water.

Next followed a lot of careful drying and about 2 hours of masking. A hateful job but worth it if I were to get any kind of decent finish.

Took a quick pic of a standard RS inlet vs a ported/matched standard inlet.

I also found a lot of worn plastic armour on the engine wiring harness. This I re-armoured and bound in fabric loom tape. The fuel rail orings were also dead so I’ve replaced these now before they become an issue.

Still got a few parts to finish off tomorrow but I think the overall appearance is greatly improved.


28b14ebc-f51e-4374-ac23-b1e02e8f0bae-jpeg.jpg

0298b3ee-a7a6-44ac-8539-a6f66bd91106-jpeg.jpg

4e3833ce-9730-49e3-b409-5304be333233-jpeg.jpg

33b10fe0-fd5c-4f22-abd4-7de350a02b37-jpeg.jpg

443b9ca7-e75e-4750-8c5d-87ab7182e221-jpeg.jpg

04f968fc-d7c1-40f2-934c-a7322fda4598-jpeg.jpg

f783bf1f-c08d-4ee7-855f-acb4a935cf31-jpeg.jpg

8dfa68a6-4ade-4804-8c9c-f8293755a8f1-jpeg.jpg

7832dbc3-468c-42c3-81c1-7b33bdfed894-jpeg.jpg

58b7307f-6de1-4a57-a251-cf8a14384491-jpeg.jpg
 
Joined
May 19, 2019
Messages
614
Reaction score
702
Location
Essex
So to finish up, I dusted the lifting eyes with some zinc and satin black before refitting those.
There was also some lengths of M6 stainless cap heads I didn’t have in stock so I’ll get some more of those, namely for the coil pack and such.
Boxed the rest of the car up this morning and called it a day on the engine bay for now. I’ve some other ideas but they’re for another day.

Another item I’ve been toying with for a while is a sunstrip. I know these divide opinion, but I had an idea and wanted to try It.
Gone with matte black, and keeping with the same idea I run on my Cayman I have gone with a gloss black accenting decal.
On the Clio I’ve gone with the “Vive Le Sport” logo in the corner.

I wasn’t sold on the sunstrip till I added the decal but in the flesh this looks loads better than even I expected.

I’ve been told I’m to return to work on Monday so tinkering time will slow now. Still, I’m quite pleased with what I’ve been able to achieve over the lockdown so far, I think the cars starting to look how I was hoping it would.


8e51ab41-06f2-440b-a7e4-3525060de5b6-jpeg.jpg

fae28014-4050-43e3-922b-38bb608942f1-jpeg.jpg

68a3498f-ab3d-470c-964f-f80f71acfec7-jpeg.jpg

79e64d86-d0ab-45e0-a7ff-e8c615306061-jpeg.jpg

32560695-9CB0-41BA-AAEB-5972FFB3D47D.jpeg
 
Joined
Mar 7, 2010
Messages
403
Reaction score
79
Engine bay looks lovely and what does the matched inlets actually do?
 
Joined
May 19, 2019
Messages
614
Reaction score
702
Location
Essex
Engine bay looks lovely and what does the matched inlets actually do?

Honestly, nothing. Just ensures there is no resulting step between the parts of the multi piece inlet manifold and ensures everything can flow as best possible.

Internet folklore mate. ?
 

Cue

Joined
May 18, 2006
Messages
6,605
Reaction score
162
Location
Republico Yorkshire
Trophy No.
274
Honestly, nothing. Just ensures there is no resulting step between the parts of the multi piece inlet manifold and ensures everything can flow as best possible.

Internet folklore mate. ?
Mine added exactly 5bhp from a before and after rolling road test I had done. Not really noticeable and the weather probably makes more of a difference but it's a slight improvement.
 
Top