Today I have mostly been ......

Joined
Nov 20, 2015
Messages
1,170
Reaction score
717
Location
Yorkshire
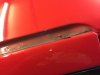
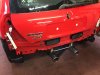
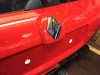
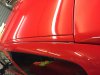
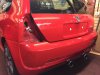
A little job done this morning. I had the bumper painted when I first picked up the car. I've just got a pair of the black trim decals from the guy on CS.

They are only £4 and are cut perfectly.

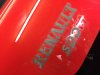
Just a tip for anyone fitting these. This is what I did.

Clean area with IPA ( the cleaner not the beer !)

Warm area and decal. Have a solution of warm water with a single drop of fairy liquid.

Peel decal off backing, I picked it off with side of model knife to avoid fingers on it.

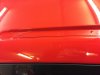
Dip decal into water solution then "float" it onto panel. The solution allows you to slide it into right position.

With a soft cloth press water from under decal while warming with heat gun on low.

Bingo.
1679e1cc7632060aae45fe2f1e610f6d.jpg
 
Joined
Dec 15, 2014
Messages
406
Reaction score
134
Location
Norwich
Looking at the Trophy and thinking it needs a proper clean even though it was only jet washed yesterday to get rid of winter grime. Fitted new cambelt, waterpump and alternator on the £100 fixer upper Punto so that can be sold soon to pay for more Trophy bits ;-).
 
Joined
Nov 20, 2015
Messages
1,170
Reaction score
717
Location
Yorkshire
Another spell in the garage after work. I dropped on a cheap Cabasse Auditorium unit on eBay, not listed very well and no code with it.

Fitted it it tonight and got the code off the free link I posted earlier this week.

Sounds a lot better
attachment.php
 

Attachments

  • image.jpg
    image.jpg
    1.8 MB · Views: 111
Joined
Mar 14, 2015
Messages
92
Reaction score
0
Location
Sidmouth, Devon
Enjoying this thread; keep up the great work! I haven't been on CS for years so had no idea about those little decals. Brilliant for £4!
 
Joined
Nov 20, 2015
Messages
1,170
Reaction score
717
Location
Yorkshire
These arrived in the post today. They are going with the pink roof trim strips and the rear hatch handle to the painters. He did a perfect match on the front so it will be he finishing touch.

I bought the replacement handles so I can get them painted and fit them at my leisure.

attachment.php
 

Attachments

  • image.jpg
    image.jpg
    218.7 KB · Views: 94
Joined
Nov 20, 2015
Messages
1,170
Reaction score
717
Location
Yorkshire
Today's Trophy task. I picked these up yesterday. Off for refurb today. Hoping they will make a nice set when done 860a9dd4b99be144f8dbbfb7738b3e22.jpg
 
Joined
Nov 20, 2015
Messages
1,170
Reaction score
717
Location
Yorkshire
I took a few bits off the car this weekend. I'm having the roof strips, the door handles and hatch handle painted to get rid of the pink bits! I'm also having the back bumper done, it's had a paint at some time and was a bit darker than the rest of the car, my paint bloke did the front when I bought it and has done a perfect match so I'm letting him have the back one.

I took the opportunity to clean a few out of sight bits. The roof channels were full of muck!
attachment.php
attachment.php


The bumper was easy enough to get off. No nasty surprises behind it, everything in nice condition
attachment.php


I started with the DA polisher tonight, I've just done the tailgate. I'm going to work my way around the car although it doesn't need a lot of correction.
 

Attachments

  • image.jpg
    image.jpg
    1.4 MB · Views: 80
  • image.jpg
    image.jpg
    1.4 MB · Views: 82
  • image.jpg
    image.jpg
    1.5 MB · Views: 86
Joined
Dec 15, 2014
Messages
406
Reaction score
134
Location
Norwich
Great work fella, mine needs some love like that, its my daily so better book some time off work in the spring to get busy.
 
Joined
Nov 20, 2015
Messages
1,170
Reaction score
717
Location
Yorkshire
I treated myself to a Dodo Juice Spin Doctor rotary polisher the other day, I decided today to give the headlights some treatment. Using Mcguiars products and a lake county pad it removed every mark in the lenses. It looks like a previous owner had made an attempt at getting rid of some of the issues and in doing so had left some scoring and rubbing down marks. It only took about 20 minutes on each headlight to get them crystal clear. Very pleased ��
attachment.php
 

Attachments

  • image.jpg
    image.jpg
    1.4 MB · Views: 113
Joined
Mar 14, 2015
Messages
92
Reaction score
0
Location
Sidmouth, Devon
I had a go at mine the other day but they are too far gone. Got some new ones to fit next week. Like Karltrophy, my T is my daily so some of my holiday allowance has to go each year on Trophy care!!

Great work again mate. You're pretty much doing all the jobs I need to do to mine! Work is getting in the way sadly.
 
Joined
Nov 20, 2015
Messages
1,170
Reaction score
717
Location
Yorkshire
some good work going in :D, how easy are the roof strips to get off?

The roof strips come off quite easily, a while ago I bought a set of trim panel removing tools off eBay, they make the job a lot easier. That said I still had to buy a couple of the little clips as they had gone brittle and snapped.
 
Joined
Nov 20, 2015
Messages
1,170
Reaction score
717
Location
Yorkshire
Busy again tonight. I did a bit more work with the rotary polisher. I decided to take the Renault Sport badges off, there is no easy way to get into the gaps in the letters so I got the fishing line out and got the badges off. I did a template of where they were mounted first
attachment.php


Then my mate arrived with my bits back from the paint shop. Rear bumper, rear hatch handle, roof strips and door handles. Lovely job and a perfect match, no more pink bits !
attachment.php
A
attachment.php
attachment.php
attachment.php


Ive just got to get the bumper built back up, I found some scuffing to the black plastic bumper insert so I think I may replace that.

Im very pleased with how the car is looking.
 

Attachments

  • image.jpg
    image.jpg
    1.8 MB · Views: 90
  • image.jpg
    image.jpg
    1.4 MB · Views: 94
  • image.jpg
    image.jpg
    1.4 MB · Views: 92
  • image.jpg
    image.jpg
    1.5 MB · Views: 93
  • image.jpg
    image.jpg
    1.4 MB · Views: 97
Joined
Dec 15, 2014
Messages
406
Reaction score
134
Location
Norwich
Great work fella, lights and new painted bits look awesome!

Glad its not just me tonesgtt ;-)
 
Joined
Mar 14, 2015
Messages
92
Reaction score
0
Location
Sidmouth, Devon
I'd love to have more time to work on it and to be able to wrap it up and tuck it away... But, on the flip side, I get to drive it every day :-D
 
Joined
Dec 11, 2015
Messages
46
Reaction score
0
Location
Bracknell, Berkshire
Just to add to my "Today thread" I spent an hour on the drivers seat belt today, I think it must have had 10 years of grime in it. I didn't realise how grubby the bit that's worn was until I started on it.

I used the same method to do my 197 belts a while ago and it really does work.
Bucket
Soap powder for hand washing
Water as hot as you can stand it
Tall stool
Soft nail brush
Microfibre cloth
Cig Lighter - Optional


Pull the belt all the way out and clamp at the B pillar with a crocodile clip or similar.

Undo do the sill anchor bracket and slip the belt off.

Stand the bucket of soap solution on the stool, this will allow you to get more of the seatbelt into the bucket. Leave to soak for 15 mins then proceed to scrub along the length of the belt. I went up and down a couple of times. Then pulling again the B pillar anchor drag the microfibre cloth all the way along the belt. Leave to dry.

I finish off by using a cigarette lighter to get rid of any loose fibres along the edge of the belt, it tidies it up nicely.

Heres as a photo I took mid way through the clean
how did do you dry them and how long did it take to dry????
 
Top