Frayz’s Inferno orange 182 - Back in the old flame

Joined
May 19, 2019
Messages
614
Reaction score
702
Location
Essex
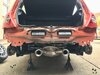
So a very kind gentleman on Pistonheads gifted me some colour coded door bullets. I trial fitted them today to see what I think.

The colour match is miles away on my car but gives me an idea if I would like to move away from the OEM silver.

My silver ones are original and have never been removed until today, so either way they need painting for a freshen up.

What colour silver is closest to the OEM
Finish?

Thoughts guys?

1134AABF-1A2F-4FB6-9777-FCBA1162BC77.jpeg
 
Joined
Mar 7, 2010
Messages
403
Reaction score
79
Look like a good match and I think they don't look to bad in same body colour.
 
Joined
May 19, 2019
Messages
614
Reaction score
702
Location
Essex
Look like a good match and I think they don't look to bad in same body colour.

In the flesh they’re miles away in terms of match. I think I preferring the OEM silver at the moment.
 
Joined
Mar 7, 2010
Messages
403
Reaction score
79
Yeah would need to see whole car with colour and silver to make my mind up I think
 
Joined
May 19, 2019
Messages
614
Reaction score
702
Location
Essex
So today’s little jobs.

Service parts arrived from RPD so I cracked on with her oil/filter. First time she’s had Castrol rather than the ELF oil. Whilst under the car I saw quite a lot of dispersed oil which I traced as PAS fluid. Close inspection found a crack in the switch housing. So I’ve ordered one of those right away

Also changed the pollen filter which I don’t think has been done at all since I last owned the car. Clearly in a s**t state and well overdue changing.

Also, one of the few upgrades I fitted in my first tenure was stainless steel Goodridge brake hoses. These have been on the car for a good 10 years I suspect, nothing wrong apart from some discolouration but I figured they were due a freshen up. This time opted for Hel stainless steel items.

Wouldn’t have chosen yellow but they came up at a discounted price so too good to pass.


10003b0f-3777-4627-9a59-22b6b958546c-jpeg.jpg

978092a0-7776-4b29-9334-ab8009d4ac46-jpeg.jpg

ade507ce-9dd7-4a02-bc37-58367561d9df-jpeg.jpg

4af4a511-6970-4ca5-8ce3-e2ee5c3bc743-jpeg.jpg

fd91316e-f3a6-400f-a083-9a3b7718d3cf-jpeg.jpg

46fce530-1183-4822-8ef2-a063c375a0dd-jpeg.jpg

ca9dedd2-58b8-4cf6-8623-5a1e69951c45-jpeg.jpg

caf9e705-e272-4d3b-b29e-0f0e433268ca-jpeg.jpg

AF06ECB7-C708-4407-91E8-E2754B5CB1C7.jpeg
 
Joined
May 19, 2019
Messages
614
Reaction score
702
Location
Essex
Lock In day 437 and reason 56732 why the neighbours think I’m mental.
First job was to bleed the brakes after the lose swap yesterday. So that was just a top up of Motul RBF600 as I had flushed and replaced the fluid over the new year.

Then I dropped the front off WZD to swap the rad. The new coolant bottle is still yet to arrive but I thought I’d get stuck in anyway.

Bumper off, crossmember off, lamps out, etc. Coolant was fresh last year anyway so that was nice and clean. However the AC condenser was in pretty poor shape at the bottom. It’s not leaking but the bottom row has corroded away on one side.
So that will have to be replaced now too.

The old rad was actually in pretty good shape, but it’s still 15 years old now so worth a refresh.
The brown isn’t dirt, it’s Dynax from where I had protected it previously. However I still gave all areas a good clean, another coat of Hydrate 80 in various areas and further coats of Dynax.

Hopefully the new coolant bottle will be here soon and I can finish this job off.


d8e8b211-a28e-44af-8885-5dd8cb41cbbb-jpeg.jpg

1c029da3-9456-4790-bf60-0df4ae663e91-jpeg.jpg

f0aadb0b-1a5d-4e7f-8364-dfd907e1f108-jpeg.jpg

28fb36de-7b5d-4bcc-80d5-4ca23fad8e76-jpeg.jpg

c717b79b-d79a-4627-a81f-b0959aae8d69-jpeg.jpg

015552da-662f-4c66-b73e-00069d026863-jpeg.jpg

871dc14d-26c4-49c8-acec-41ed68622667-jpeg.jpg
AAE54160-6719-4190-9CF5-9B8396C32CAE.jpeg
 
Joined
Mar 7, 2010
Messages
403
Reaction score
79
Was the bumper easy to take off as I'm going to fit the refurbished Sachs soon and thought while sealing front arches might get front behind bumper done too.
 
Joined
May 19, 2019
Messages
614
Reaction score
702
Location
Essex
Was the bumper easy to take off as I'm going to fit the refurbished Sachs soon and thought while sealing front arches might get front behind bumper done too.

Bumper removal on these are laughably easy to remove.
Get the front of the car elevated as it’s much easier to see.

- 2x plastic press clips at the top of the grille
- 4x torx (2 per side) screws that attach the front wheel arch liners to the front bumper under the splitter.
- 2x (1 per side) 10mm head M6 screws that fasten the bumper tops to the front wings. These are under the arch liner.
- 2x 10mm head screws that hold the plastic bumper undertray to the subframe under the radiator.

Give the bumper a strong tug each side where it meets the front wings. These are very tight but they do come out easy enough.

As the bumper comes away, don’t forget the plug for the fog lamps on the NS of the bumper.
 
Joined
May 19, 2019
Messages
614
Reaction score
702
Location
Essex
Project lockdown continued today with the arrival of a new PAS switch to try and cure my PAS leak.
Still no coolant bottle arrival so that will have to wait. Anyway, I fitted the new PAS switch which hopefully does the trick.

Also decided to bite the bullet and crack on with the roll centre correction hubs and other bits. These are now fully assembled with new rose joints, rod ends and genuine SNR bearings.

With no way of setting the track rod lengths easily I decided to remove the old ones inner and outer as one piece and make their location. This way I could hopefully build the new ones to the correct length before installing. (That’s my plan anyway ?)
I found when setting the TCA lengths on their shortest setting they were bottoming out at approx the size I needed. This left too little room for adjustment to my mind so I shortened the rod ends by approx 15mm.
Also had new lower arms to go on with Powerflex black series poly bushes installed so they went on too. So once these are on, apart from the front ARB, that’s every bush, bearing, mount and ball joint replaced on the whole car. Green Loctite 630 was used on all fixed parts and Finishline Ti Prep used on all adjustable threads.

I didn’t start till late so I’ll fit the TCAs tomorrow and torque everything up. There are also a number of dirty bits under here I plan to clean/paint once this stuff is done.

Just need the torque specs for the following if anyone has these to hand.

- Wishbone to subframe bolts
- Front drive shaft hub nuts
- Caliper carrier to hubs

Thanks


4921fe6f-1f1d-4f5d-94de-07e6ce70caed-jpeg.jpg

f4b61582-8153-4386-8ca6-24ee69382258-jpeg.jpg

d706a9a8-0ff8-484a-ae71-ba9b522be61d-jpeg.jpg

57a310fe-94b2-4ec8-87ac-61333fde2968-jpeg.jpg

b352f072-6656-4608-a660-f26aaea1fe42-jpeg.jpg
 
Joined
Feb 24, 2018
Messages
145
Reaction score
169
Location
Solihull
Trophy No.
077
According to the Workshop Manual the values you require are as follows:

- Wishbone to subframe bolts. 90Nm
- Front drive shaft hub nut. 280Nm
- Caliper carrier to hubs. 100Nm

I hope I have interpreted your information correctly.

It may be worth having a few other owners verify these values before you start.
 

Cue

Joined
May 18, 2006
Messages
6,607
Reaction score
163
Location
Republico Yorkshire
Trophy No.
274
Before you fill the coolant, i'd consider putting the waterless fluid in instead of normal antifreeze - it ensures it won't need changing again as it lasts 10 yrs min and means the rad won't corrode, ever.
 
Joined
May 19, 2019
Messages
614
Reaction score
702
Location
Essex
Before you fill the coolant, i'd consider putting the waterless fluid in instead of normal antifreeze - it ensures it won't need changing again as it lasts 10 yrs min and means the rad won't corrode, ever.

If you mean the Evans stuff, I’d rather not.
I really don’t like it and if you ever have an issue, you can’t top up with water in an emergency.
Coolant isn’t expensive or difficult to change. After 15 years, my visible water ways look mint. So I’d rather change it regularly as I don’t think it’s a issue. ?
 
  • Like
Reactions: Cue
Joined
May 19, 2019
Messages
614
Reaction score
702
Location
Essex
According to the Workshop Manual the values you require are as follows:

- Wishbone to subframe bolts. 90Nm
- Front drive shaft hub nut. 280Nm
- Caliper carrier to hubs. 100Nm

I hope I have interpreted your information correctly.

It may be worth having a few other owners verify these values before you start.
Thanks chap. Sorted now.
 
Joined
May 19, 2019
Messages
614
Reaction score
702
Location
Essex
Coolant bottle finally turned up so fitted that, filled and bled the system with new Renault type D coolant.

New TCAs assembled and fitted. All hub hardware checked, double checked and marked before running it down the road to my local tyre shop to get the geometry setup. The short very slow drive there was awful, I could feel it toeing out massively and it was pulling itself from the road.

Ride heights set so the lower arms are parallel with the ground, toe out 12 min, front camber set to 2 deg negative.

Again I can’t really drive it, but the first impressions are very positive. The damping feels mega. Super compliant and the steering fast and accurate. The way the car feels on the road now is very impressive. It’s just solid planted and very positive. Bumps and undulations don’t even faze the chassis at all and there is zero tramlining or bump steer even on the fat 888s.
The 888s are unscrubbed so don’t yet inspire any confidence but I’m keen to get out and play with the setup more when we are all allowed back out.

Came home, spanner/torque checked everything again before coating everything in a thin film of ACF50 and Dynax I’n various places.
Keen eyes will notice the absence of ABS sensors. This is because they weld themselves in and mine were no exception. So rather than fight to get them out, I’ve just ordered a new pair.


1699e025-dcca-440a-9a7d-fee50a7221e0-jpeg.jpg

86da8455-f5d9-4e78-a8e4-4625dd8545fc-jpeg.jpg

32dcd8a1-a4c4-4232-8e46-c50202762d61-jpeg.jpg

26cb130d-2fa2-467b-8ced-cae46321ebad-jpeg.jpg

747c27d5-dc5f-4535-a409-f68b19692c28-jpeg.jpg
364288D3-73E3-4C1C-ACEE-8ECD3D6F8072.jpeg
 
Joined
May 19, 2019
Messages
614
Reaction score
702
Location
Essex
Project lockdown.

So having cleaned and protected the front panel when I did the rad, today I wanted to pop the rear bumper off and check the rear.
Instantly turned into a longer job than expected as both the rear arch liner fixings sheared clean off. Great!! #facepalm

So I decided to grind them back and add some M6 RivNuts.
Drilled, Hydrate 80, Electrox, satin black and then filled the cavity with RTV before installing the inserts. This should ensure theyre as sealed and as protected as possible. Once all was dry, I coated in Dynax.

Then on to the rear panel, this was cleaned and found almost no corrosion at all. However, I decided to treat it all anyway and protect it a best i can.
Same process, clean, hydrate 80 on any suspect areas, Electrox, Satin black and finished with Dynax. Arch liners and bumper brackets were cleaned and dressed with Carpro Perl 4:1 before refitting with fresh hardware.

As you can see, shes no show pony but hopefully should protect this vulnerable area for years to come.


ce789b05-2360-49e0-acbe-28141afc0d57-jpeg.jpg

0c4d24e1-2635-4ea6-b954-083ccc6af249-jpeg.jpg

58fd7590-5d89-41f8-bbfe-45df72bd050d-jpeg.jpg

e71b5979-bb07-47f5-a30d-b5765edf8521-jpeg.jpg
 
Joined
Feb 24, 2018
Messages
145
Reaction score
169
Location
Solihull
Trophy No.
077
Quality work, photos and write-up. A great guide for us all and an example of what can be achieved with time, knowledge, expertise and a bit of spare cash.?
Keep up the posts I am certainly learning?
 
Joined
May 19, 2019
Messages
614
Reaction score
702
Location
Essex
Quality work, photos and write-up. A great guide for us all and an example of what can be achieved with time, knowledge, expertise and a bit of spare cash.?
Keep up the posts I am certainly learning?

Thanks chap,
Like I say, it’s no show pony, but after 15 years, I’m just trying to preserve the little car I love so much. its my daily driver and up to 125k miles now, so will never be worth anything, but I absolutely love it so will attempt to keep it as nice as I can for as long as possible.
 
Top